One more thing to deploy a Django project for public access

Configure Django project for public access
For Django project to work in the web browser, some additional changes may be needed.
Open the settings.py file for the Django project (inside the PROJECT_ROOT\config or PROJECT_ROOT\PROJECT_NAME folder) and follow these steps:

  1. Add this code to the top of the file.
    import os
  2. Disable debug mode.
    DEBUG = False
  3. Set ALLOWED_HOSTS for Django project remotely accessible.
    • Public access to Django project:
      ALLOWED_HOSTS = ['*']
    • or…

    • Restricted access, e.g. only requests from the 11.22.33.44 IP address:
      ALLOWED_HOSTS = ['11.22.33.44']
  4. Set STATIC_URL and STATIC_ROOT to serve static files.
    STATIC_URL = 'static/'
    STATIC_ROOT = os.path.join(BASE_DIR, 'config/static')
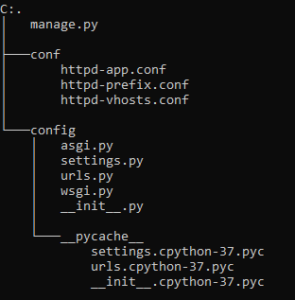
  5. *The config folder is the folder that contains settings.py, urls.py, wsgi.py, … inside.

  6. Build static files by executing the following command.
    C:\Users\USER_NAME\Bitnami Django Stack projects\PROJECT_ROOT>python manage.py collectstatic --noinput
  7. This command will copy static files in folder C:\Bitnami\djangostack-3.1.4-0\apps\django\Django-3.1.4-py3.7.egg\django\contrib\admin\static to folder C:\Users\USER_NAME\Bitnami Django Stack projects\PROJECT_ROOT\config\static
    We have to change something in the C:\Users\USER_NAME\Bitnami Django Stack projects\
    PROJECT_ROOT\conf\httpd-app.conf, like this…
    #Alias /PROJECT_ROOT/static "C:/Bitnami/djangostack-3.1.4-0/apps/django/
    Django-3.1.4-py3.7.egg/django/contrib/admin/static"
    Alias /mfdw_site/static "C:/Users/USER_NAME/Bitnami Django Stack projects/
    PROJECT_ROOT/config/static"
    I suppose …. this means that we will use the static files those are inside the folder C:\Users\USER_NAME\Bitnami Django Stack projects\PROJECT_ROOT\config\static.
    Ref: Serving Static Files in Python With Django, AWS S3 and WhiteNoise

  8. Additional correcting the TIME_ZONE in settings.py file for the Django project
    (inside the PROJECT_ROOT\config or PROJECT_ROOT\PROJECT_NAME folder)
    #TIME_ZONE = 'UTC'
    TIME_ZONE = 'Asia/Bangkok'
  9. Ref: List_of_tz_database_time_zones

How to implement Django Project/App in Bitnami Django Stack on localhost

Ref:
Get Started With Django
Deploy A Django Project
 
Ref (for html): HTML escape character

Start project “HelloWorld” and create App in the project named “pages”.

  1. We use the command line prompt by running batch file (C:\Bitnami\djangostack-3.1.4-0\use_djangostack.bat),
    assuming that Bitnami Django Stack is installed in this folder.
    By running this batch file, we can create django project (or python program) in virtual environment
    (Bitnami Django Stack Environment; please see the related batch files for details i.e., use_djangostack.bat, setenv.bat)
    Virtualenv cmd1
  2. Next, develop the django project in folder C:\Users\USER_NAME\Bitnami Django Stack projects\ (USER_NAME is your user name in your PC)
    C:\Users\USER_NAME\Bitnami Django Stack projects>mkdir HelloWorld && cd HelloWorld
    C:\Users\USER_NAME\Bitnami Django Stack projects\HelloWorld>django-admin startproject config .
    By running django-admin startproject config . with the period at the end, it will install in the current directory with the folder config.
  3. Create folder conf inside the project folder (C:\Users\USER_NAME\Bitnami Django Stack projects\HelloWorld).
    Actually you can copy this folder from the sample project provided by Bitnami Django Stack.
    We can see the folder structure like this
    conf folder
    The details in these files are,
    C:\Users\USER_NAME\Bitnami Django Stack projects\HelloWorld\conf\httpd-app.conf
    <Directory "C:/Users/USER_NAME/Bitnami Django Stack projects/HelloWorld/config">
        Options +MultiViews
        AllowOverride All
        <IfVersion < 2.3 >
            Order allow,deny
            Allow from all
        </IfVersion>
        <IfVersion >= 2.3>
            Require all granted
        </IfVersion>
     
    WSGIApplicationGroup %{GLOBAL}
    Require all granted
     
    </Directory>
     
    Alias /HelloWorld/static "C:\Bitnami\djangostack-3.1.4-0\apps\django\Django-3.1.4-py3.7.egg/django/contrib/admin/static"
    WSGIScriptAlias /HelloWorld 'C:/Users/USER_NAME/Bitnami Django Stack projects/HelloWorld/config/wsgi.py'

    C:\Users\USER_NAME\Bitnami Django Stack projects\HelloWorld\conf\httpd-prefix.conf
    # Include file
    Include "C:/Users/USER_NAME/Bitnami Django Stack projects/HelloWorld/conf/httpd-app.conf"

    C:\Users\USER_NAME\Bitnami Django Stack projects\HelloWorld\conf\httpd-vhosts.conf
    <VirtualHost *:81>
        ServerName djangostack.example.com
        ServerAlias www.djangostack.example.com
        DocumentRoot "C:/Users/USER_NAME/Bitnami Django Stack projects/HelloWorld/config"
     
        Include "C:/Users/USER_NAME/Bitnami Django Stack projects/HelloWorld/conf/httpd-app.conf"
    </VirtualHost>
     
    <VirtualHost *:443>
        ServerName djangostack.example.com
        ServerAlias www.djangostack.example.com
        DocumentRoot "C:/Users/USER_NAME/Bitnami Django Stack projects/HelloWorld/config"
        SSLEngine on
        SSLCertificateFile "C:/Users/USER_NAME/Bitnami Django Stack projects/HelloWorld/conf/certs/server.crt"
        SSLCertificateKeyFile "C:/Users/USER_NAME/Bitnami Django Stack projects/HelloWorld/conf/certs/server.key"
     
        Include "C:/Users/USER_NAME/Bitnami Django Stack projects/HelloWorld/conf/httpd-app.conf"
    </VirtualHost>
  4. Modify setting.py in the folder config of the project (add ‘127.0.0.1’ and ‘localhost’ to ALLOWED_HOSTS).
    C:\Users\USER_NAME\Bitnami Django Stack projects\HelloWorld\config\setting.py
    ...
    ALLOWED_HOSTS = ['127.0.0.1', 'localhost']
    ...
  5. Add the line of include file httpd-prefix.conf lacation in bitnami-apps-prefix.conf,
    which is located in the installation folder (C:\Bitnami\djangostack-3.1.4-0\apache2\conf\bitnami\)
    C:\Bitnami\djangostack-3.1.4-0\apache2\conf\bitnami\bitnami-apps-prefix.conf
    ...
    Include "C:/Users/USER_NAME/Bitnami Django Stack projects/HelloWorld/conf/httpd-prefix.conf"
  6. Modify details in wsgi.py in the folder config of the project.
    C:\Users\USER_NAME\Bitnami Django Stack projects\HelloWorld\config\wsgi.py
    ...
    import os, sys
    sys.path.append('C:/Users/USER_NAME/Bitnami Django Stack projects/HelloWorld')
    os.environ.setdefault("PYTHON_EGG_CACHE", "C:/Users/USER_NAME/Bitnami Django Stack projects/HelloWorld/egg_cache")
    ...
  7. Almost done, just start the Apache Web Server by click the icon Bitnami Django Stack Manager Tool (run the manager-windows.exe).
  8. Now, run the web browser and point the url to http://127.0.0.1:81/HelloWorld and you can see like this ↓
    django_helloworld_project
    … (to be continued)