Follow this method…
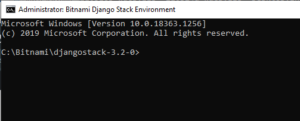
1) Start the Bitnami Django Stack Environment console (run batch file: use_djangostack.bat in C:\Bitnami\djangostack-3.2-0)
2) Change directory to the Bitnami project directory (C:\Users\usrname\Bitnami Django Stack projects) and create a new directory (\mysite), which is the folder for Git repository root.
C:\Users\usrname\Bitnami Django Stack projects>mkdir mysite

C:\Users\usrname\Bitnami Django Stack projects>cd mysite

C:\Users\usrname\Bitnami Django Stack projects\mysite>
3) Create a new Django project called config with the following command. Don’t forget the period . at the end.
https://djangoforbeginners.com/initial-setup/
C:\Users\usrname\Bitnami Django Stack projects\mysite>django-admin startproject config .
By running django-admin startproject config . (with the period at the end), will installs in the current directory and has the directory structure:
C:\Users\usrname\Binami Django Stack projects\mysite--manage.py

                                                   |--config

                                                      |--__init__.py

                                                      |--asgi.py

                                                      |--settings.py

                                                      |--urls.py

                                                      |--wsgi.py
Ref:
Django from Full Stack Python
How to Switch to a Custom Django User Model Mid-Project