How to use Django with Apache and mod_wsgi
How to use Django with Apache and mod_wsgi
DjangoのWSGI周りのコード読んだ
Author: admin
Deploy A Django Project (Create a customer virtual host) for Production site
Approach A: Bitnami Installations Using System Packages
👆Identify whether the Bitnami stack uses native Linux system packages (Approach A),
or self-contained installation (Approach B) by running the command below:
bitnami@debian:~$ test ! -f "/opt/bitnami/common/bin/openssl" && echo "Approach A: Using system packages." || echo "Approach B: Self-contained installation."
To serve the application through the Apache web server with the mod_wsgi module,
follow the steps below.
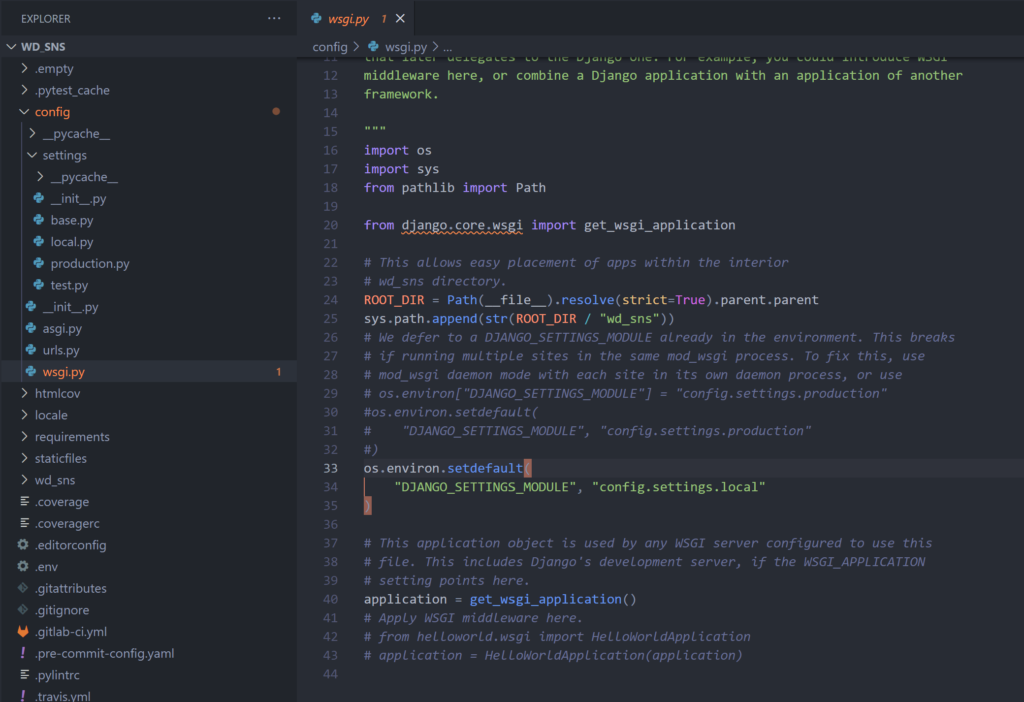
Enable WSGI configuration for the Django application
Ensure the Django project contains a wsgi.py file with contents similar to this:
import os

from django.core.wsgi import get_wsgi_application

os.environ.setdefault('DJANGO_SETTINGS_MODULE', 'PROJECT.settings')

application = get_wsgi_application()
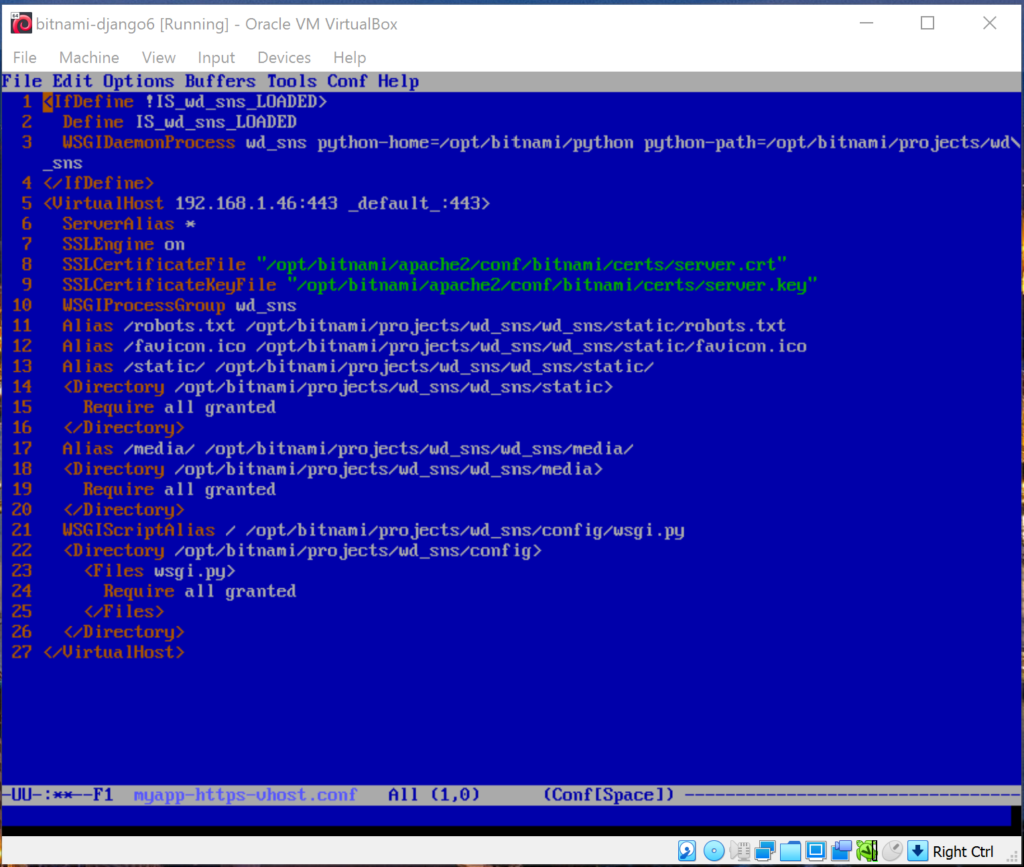
Enable predefined virtual hosts for a Django project
The Bitnami installation comes with predefined HTTP and HTTPS virtual hosts for running Django projects
with the mod_wsgi module. To enable them, follow the steps below:
- Copy the files to remove the .disabled suffix:
NOTE: These files assume that the Django project is named sample
and is located at /opt/bitnami/projects/sample.
If your Django project is named or located differently, edit the
files below and update the file paths accordingly.
bitnami@debian:~$ sudo cp /opt/bitnami/apache2/conf/vhosts/sample-vhost.conf.disabled /opt/bitnami/apache2/conf/vhosts/sample-vhost.conf

bitnami@debian:~$ sudo cp /opt/bitnami/apache2/conf/vhosts/sample-https-vhost.conf.disabled /opt/bitnami/apache2/conf/vhosts/sample-https-vhost.conf

- Restart Apache for the changes to be taken into effect:
bitnami@debian:~$ sudo /opt/bitnami/ctlscript.sh restart apache
Ref:
Connect To The Virtual Machine From Another Host
VMware Workstation Pro
VMware Workstation Player
VMware Workstation Player Documentation
VMware Workstation 16 Pro
Buy Online the License for VMware Workstation Pro –> Today Online bought! (199+13.93 = $212.93)
VMware Workstation (Compare Product)
Django Packaged By Bitnami For VMware Marketplace
How to share folders between Windows and Ubuntu using VMware Player
Manually Install VMware Tools on Linux
How to Install VMware Tools
✔Mounting VMware Shares from the Command Line on Linux VM
✔How to Install VMware Tools on Ubuntu/Debian VMware Virtual Machine
✔How to mount Windows shares in Mint Linux 18.3
Mounting Shared Folders in a Linux Guest
Mount VMware Shares on Linux VM:
bitnami@debian:~$ cd /opt/bitnami

bitnami@debian:/opt/bitnami$ sudo mkdir PROJECTS

bitnami@debian:/opt/bitnami$ sudo chmod 777 PROJECTS

bitnami@debian:/opt/bitnami$ cd

bitnami@debian:~$ sudo mount -t fuse.vmhgfs-fuse -o allow_other .host:/VM_DJPROJECTS /opt/bitnami/PROJECTS
If error happen, using this command,
bitnami@debian:~$ sudo vmhgfs-fuse -o nonempty -o allow_other .host:/VM_DJPROJECTS /opt/bitnami/PROJECTS
*VM_DJPROJECTS is the shared folder name in Host computer (Windows).
PROJECTS is the shared folder in Guest computer (Linux Debian).
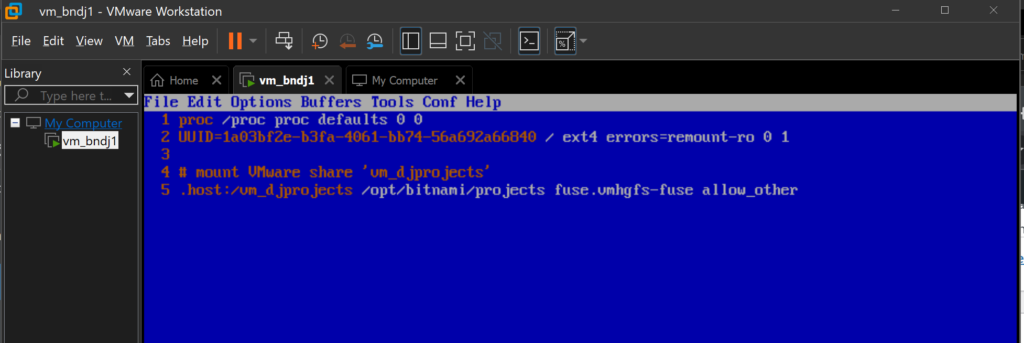
Automatically Mount VMware Shares:
If you want the VMware Linux VM to automatically mount the VMware share on boot,
you have to add a new line to the /etc/fstab file.
bitnami@debian:~$ cd /etc

bitnami@debian:/etc$ sudo chmod 777 fstab

bitnami@debian:/etc$ emacs fstab
Using chmod command to change file permission back to original.
bitnami@debian:/etc$ sudo chmod 644 fstab

Then, reboot.
bitnami@debian:/etc$ sudo reboot
Mikrotik Manual from Easy Network

Buy Mikrotik:

DEBUG_TOOLBAR_CONFIG
To show the DjDT (Django-debug-Toolbar), need DEBUG=True and IP of the request must be in the INTERNAL_IPS.
(https://django-debug-toolbar.readthedocs.io/en/latest/installation.html#internal-ips)

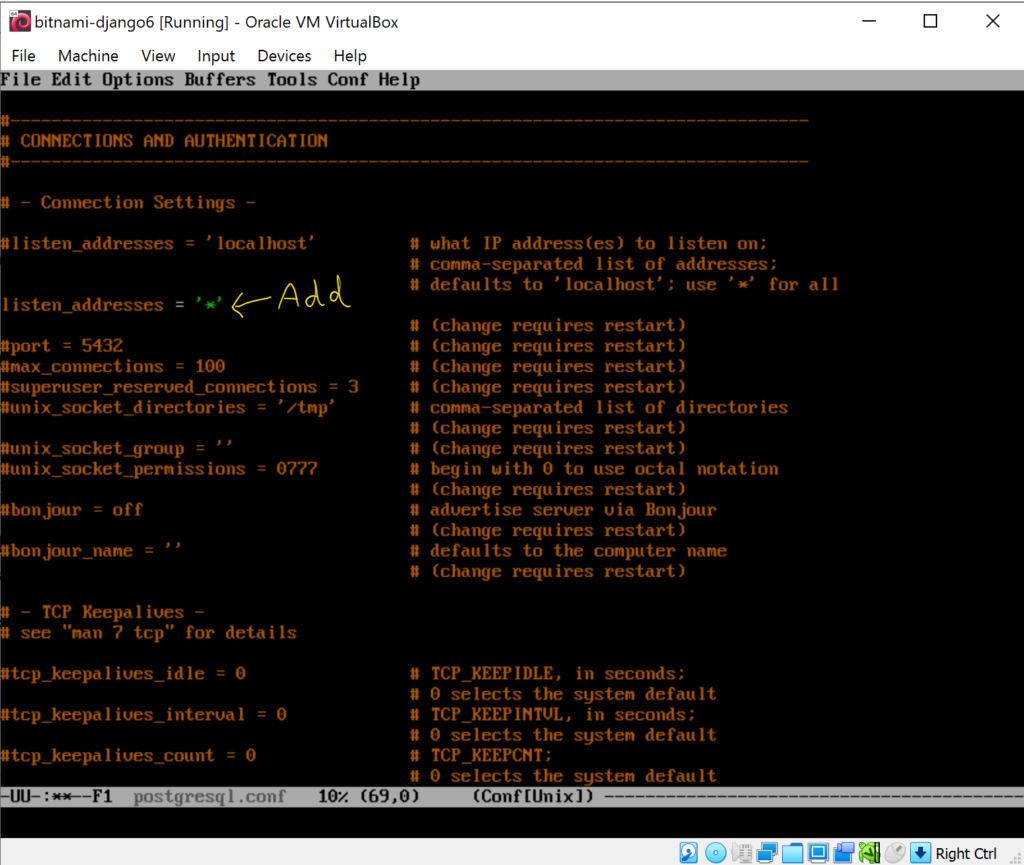
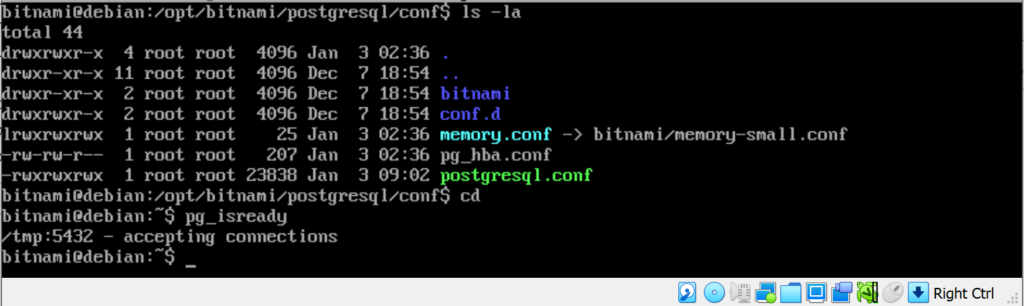
Cannot connect to PostgreSQL (listening on port 5432) in Bitnami Django (VM VirtualBox)
Edit the postgresql.conf (in the folder /opt/bitnami/postgresql/conf), by adding this line
#-------------------------------------------

# CONNECTONS AND AUTHENTICATION

#-------------------------------------------

listen_addresses = '*'
Restart the service,
bitnami@debian:~$ sudo /opt/bitnami/ctlscript.sh restart postgresql
Check the remote connection again,
bitnami@debian:~$ pg_isready
git error: remote origin already exists
Sometime when we initialize the Local Repo, we get error: remote origin already exists.
The following step is solution.
Initialize the current folder as a Git repo:
bitnami@debian:~$ git init
bitnami@debian:~$ git remote add origin git@github.com:username/repostioryname.git
Then, error occurs:
error: remote origin already exists.
We need to remove the older origin by:
bitnami@debian:~$ git remote rm origin
Then, add the origin again:
bitnami@debian:~$ git remote add origin git@github.com:username/repostioryname.git
Add files:
bitnami@debian:~$ git add .
Commit with the descriptive message:
bitnami@debian:~$ git commit -m "Comment message"
Push the changes:
bitnami@debian:~$ git push -u origin master